
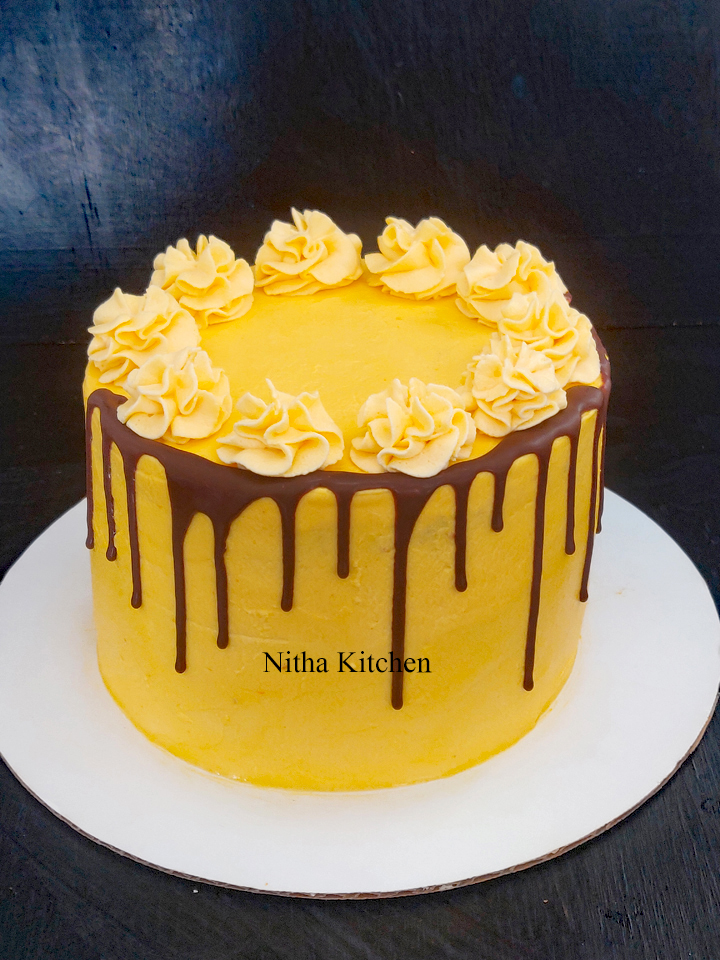
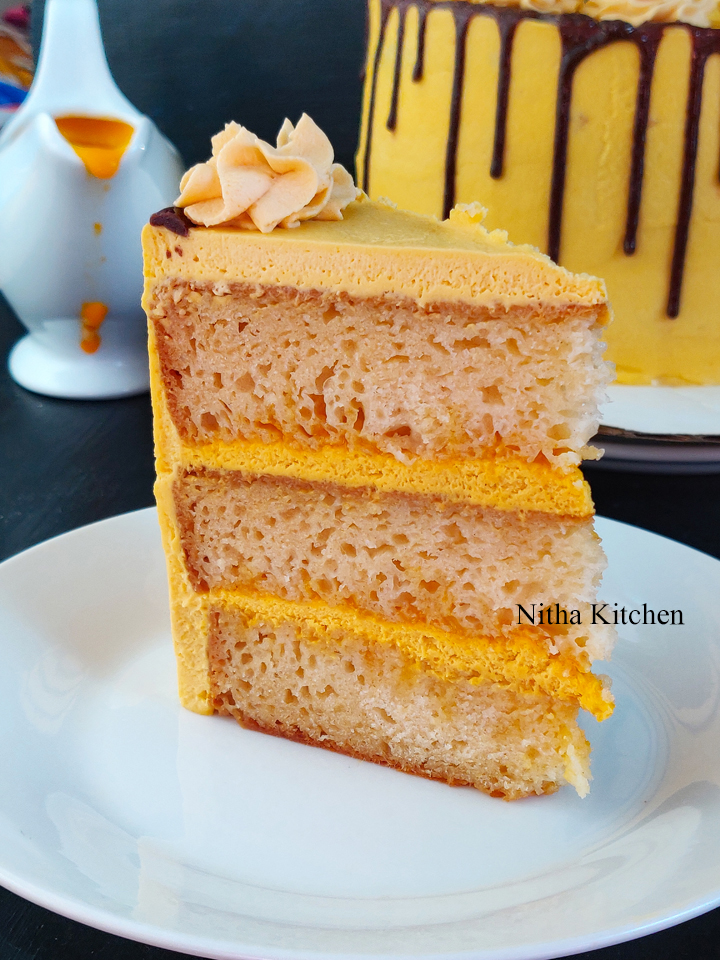
Eggless Mango Tiramisu Layer Cake , its an egg free, caffeine and alcohol free Mango flavored delightful cake made from scratch. Yup used homemade mango puree from fresh mangoes and also used homemade mascarpone cheese to make this dessert. Instead of “Savoiradi” I used egg free, butter free, oil based 6″ sponge cake layers. I made this cake for my son’s
10th birthday.
TIRAMISU means “pick me up” or “carry me up” in Italian which most likely refers the two caffeinated ingredients that are present in the dish, espresso and cocoa. This dessert is also called as Tuscan Trifle. But this Mango Tiramisu recipe is a caffeine , cocoa and alcohol free version and good for kids and grownups who look for a recipe alike. You can call this fusion dessert as “Mangomisu”. Will be discussing further about this recipe and how it varies from the traditional one in the “FAQ” session.
Video Recipe In Short
- Three 6 ” Layer Eggless Sponge Cake
- Homemade Mango Puree
- Homemade Mango Preserve
- HM Mango Nectar
- Mango Whipped Cream Filling
- Mango Mascarpone Whipped Cream Frosting
- How to Trim/Level Cake Layers
- Eggless Mango Tiramisu Cake Assembling
- Cake Frosting
- Chocolate Drip Decoration
FAQ
Classic Tiramisu
TIRAMISU is a coffee flavored Italian dessert. It is a rich treat made of ladyfingers (savoiardi) dipped in coffee, layered with a whipped mixture of eggs, sugar mascarpone cheese and wine, flavored with cocoa. The recipe has been adapted into many varieties of cakes and other desserts. There are several versions , several changes to the original recipe so how traditional Tiramisu is made?
Traditional tiramisu begins with Savoiardi Ladyfingers, light and delicately sweet sponge cake biscuits. Traditionally tiramisu is a pudding-like dessert that usually consists of sponge cake or ladyfingers dipped in a liqueur, then layered with grated chocolate and rich custard. Traditionally, Tiramisu is made with Marsala wine in the filling, and the ladyfingers are soaked in a boozy coffee mixture. The Marsala wine gets cooked over a double boiler, along with egg yolks and a little bit of sugar.
How this recipe is different from classic Tiramisu?
- Egg Free Recipe
- Butter Free Cake Sponges instead of Savoiardi
- Alcohol Free
- Caffeine Free
- Cocoa Free
Mascarpone Cheese
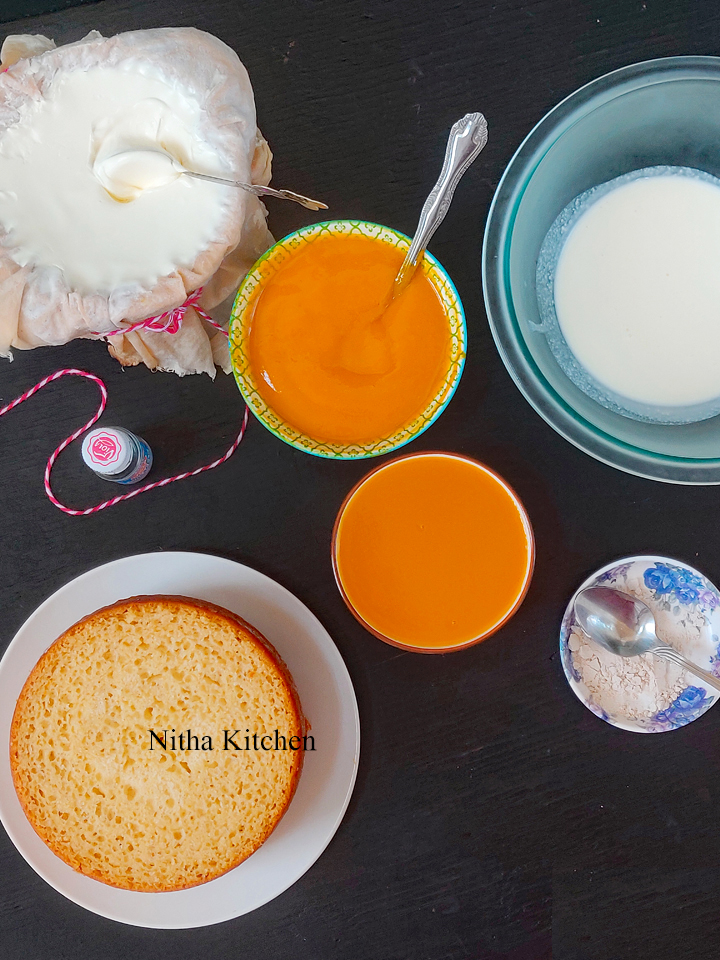
Mascarpone is a soft and creamy fresh cheese originating in the north of Italy. Its traditionally made with buffalo milk. Mascarpone Cheese or Mascarpone (in short) is made by adding a tartaric acid or citrus acid like lemon juice to full-fat heavy cream, which naturally separates the curds from the whey. So all you need is heavy cream and lemon juice or cream of tartar.
The authentic Mascarpone Cream is obtained by whipping these soft cheese with eggs and sugar. This rich and creamy is used in baking cheesecakes, perfect for frosting cakes or cupcakes or just add to top a bowl of fruit. I have a separate detailed video post on Homemade Mascarpone please refer to make at home.
Recipe Variations
- You can use store bought or homemade Savoiardi Ladyfingers instead of cake sponges.
- Do use canned Mango Puree.
- Do use store bought Mango juice to ease the process.
- Can use store bought Mascarpone.
- You can use dairy free whipping cream.
- If using store bought as mentioned above do skip several process explained below and move directly to “Mango Whipping Cream“
Homemade Mango Puree VS Preserve
You can just blend Mango puree, sugar and lemon juice and use it immediately. But if you are making ahead do boil and this preserve stays good for a long time when stored in refrigerator and properly handled using clear spoon every time. I use it up within 15days (It lasted only that long, will update details on it in the original preserve recipe). And this preserve based cake, whipped cream , frosting has longer shelf life than the fresh one. The cake stayed good for 3 days with properly stored in an air tight container. If using fresh puree do consume within 1-2 days.
How the cake batter should be for butter free cake?
Butter based cake are little thick in consistency and while baking the butter melts and keeps the sponge moist, rich and good in texture. creaming butter and sugar based cakes should not be thin which leads to dense cake. There is a lot of science involved in butter based and oil based cakes, I am making it short here. You can refer “HERE” to know how the butter based cake batter should be. Whereas oil based cake batter is little gooey (not so thin) compared to it like shown below to get a fluffy and light sponge cake.
MANGO SPONGE CAKE
Eggless MANGO SPONGE CAKE 3-6″ layer cakes of 3 – 3.25 inch height in total or use 2 – 8″ or 9″ cake pans. )
All Purpose Flour – 2.25 Cups
Thick Curd – 1 Cup
Flavorless Oil – 1/2 Cup (I use cholesterol free oil)
Sugar – 3/4 Cup
Sweetened Condensed Milk – 1/2 Cup
Whole Milk – 1/2 Cup
Baking Powder – 2.25tsp
Baking Soda – 3/4tsp
Salt – 1/4tsp
Mango Flavor – 1tsp
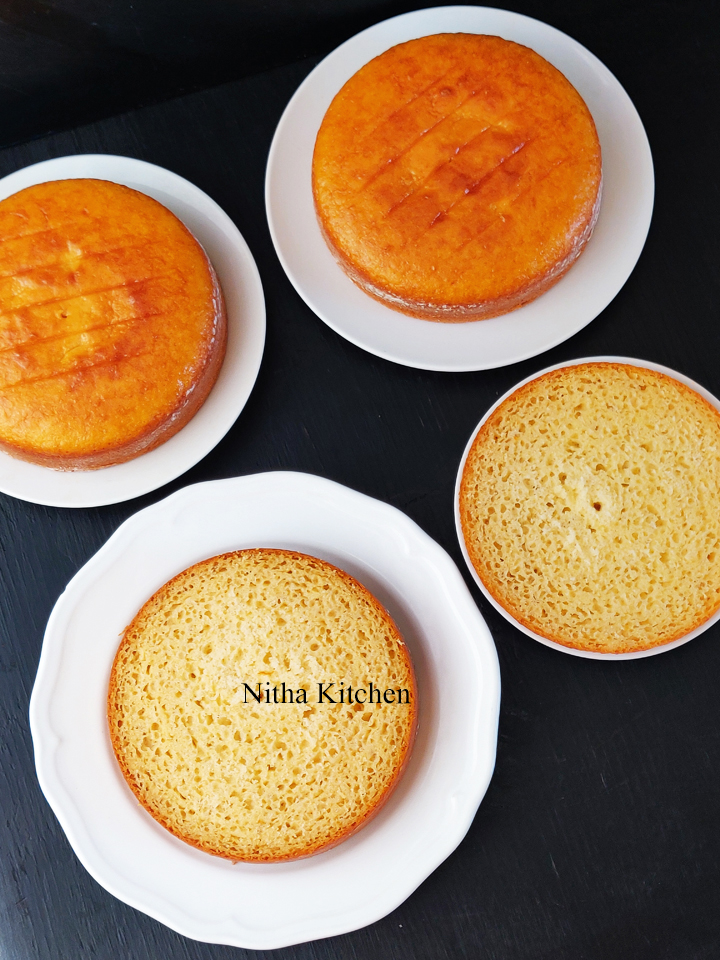
I just adapted Eggless Pineapple Pastry (Video Recipe Later) to Mango flavored sponge cake. I have cut short those detailed sponge cake making process in the video recipe which you can refer in Egg free pineapple pastry cake later. I prepared the cake batter using hand whisk and this recipe is an inspiration from both Eggless Sponge Cake and Eggless Butter Free Sponge Cake Recipes.
- Grease the pans with butter or oil or shortening + flour and keep aside.
- In a bowl add all purpose flour, baking powder, baking soda and salt, mix them well and keep aside.
- In another mixing bowl add thick curd/unflavored yogurt and sugar.
- Whisk them both until sugar incorporates well with yogurt.
- Later add oil, condensed milk, and milk to yogurt mixture.
- Now to this wet mixture add the dry ingredients mixture in three batches.

- Once done do pour the cake batter equally in three 6″ cake pans.
- Bake in preheated oven @350F/180C for 20-22 minutes.
- Check the doneness by inserting toothpick at the center of the cake, if it comes out clear do cool over cooling rack.
- Let them cool for 10 minutes later release the cake from cake pans and let it cool completely.
- Once cooled completely you can use the cake immediately or wrap it using cling film and store in freezer.
HOMEMADE MASCARPONE CHEESE
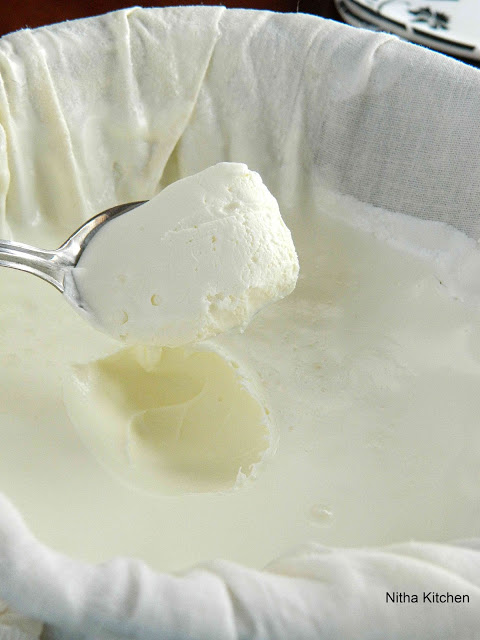
I feel very comfortable with homemade cheese and every time it turns out great. Have made classic Egg based Tiramisu and Egg free Tiramisu Cake using homemade cream. Now using homemade Mascarpone made Mango flavored Mascarpone Whipped Cream to frost the cake. Please do check detailed video recipe for how to make Homemade Mascarpone Cream. I usually prepare it a day before frosting the cake. This homemade cream takes 18-24 hours to set so plan accordingly.
MANGO PUREE
- For this recipe I took 3 Ataulfo mangoes, soaked a while in water, then rinse, wipe the moist over mangoes.
- Cut the mangoes in to three parts leaving the center pit portion as it is.
- Scoop out the puree from the two pit free halves and we do enjoy eating the pit portion as it is.
- Grind the puree to smooth texture using food processor.
- This is homemade fresh Mango Puree and can be used wherever the recipe calls for Mango Puree.

MANGO PRESERVE
Now you may wonder why to make preserve as you can directly add the puree in the recipe. Because of summer mangoes ripen so earlier then expected. So to use it for the birthday cake I pureed, cooked and made preserve using few simple ingredients. Once the preserve cooled completely I stored in the refrigerator and used in several recipes including this Recipe. The preserve tasted exactly like the store bought/ canned puree. The actual Mango Preserve Recipe (will post soon) has more sugar and lemon juice which I adapted to suit this Mango Tiramisu recipe. Also I have several tips how to store ripen mangoes , so and so will share in that same post.
Ingredients
Mango Puree – 1.5 Cups
Lemon Juice – 1/2 Tbsp.
Sugar – 1/2 Cup (used 50:50 raw cane sugar and regular one)
* Complete use of raw cane sugar changes the color of mango preserve.
1.5 Cups fresh Mango Puree from 2.5 Ataulfo mangoes.
- In a wide pan, add prepared fresh mango puree, sugar and lemon juice (Pic 1).
- Simmer for 2-3 mins in low flame make sure it’s not burnt.
- Keep stirring and when it attains a rolling boil (pic 2) do remove from the flame.
- Once cooled completely either use immediately or store in clean jar and refrigerate for later use (pic 3).

MANGO NECTAR
You can either make mango nectar ahead or on the time of assembling the cake, either way works. This homemade Mango nectar unlike the regular one is thin and mildly sweetened and specially made to soak the cake sponges in this recipe. So do adjust the sweetness and consistency of the nectar as you like. The consistency shown above in Pic 6 soaks the sponges well so don’t make the nectar thick. If using store bought puree do dilute accordingly.
Ingredients
Prepared Mango Preserve / Store Bought Puree – 1/2 Cup
Sugar – 1/4 Cup (Half regular and half Raw Cane Sugar)
Lemon Juice – 1tsp (Optional)
Water – 3/4 Cup
Yields – 1 Cup Nectar
- Simmer water and sugar (pic 4) for 5 mins in low- medium flame.
- I used the same preserve prepared pan.
- Later add prepared mango preserve or store bought puree (pic 5).
- Adjust sugar if needed and when its hot do add lemon juice and remove from flame.

MANGO WHIPPING CREAM
Ingredients
Mango Preserve – 1/3 Cup
Whipping / Heavy Cream – 1/2 Cup (120ml)
Cardamom Powder – 1tsp (powdered with sugar)
Optional Powdered Sugar – As Needed (2-4 Tbsp. approximately)
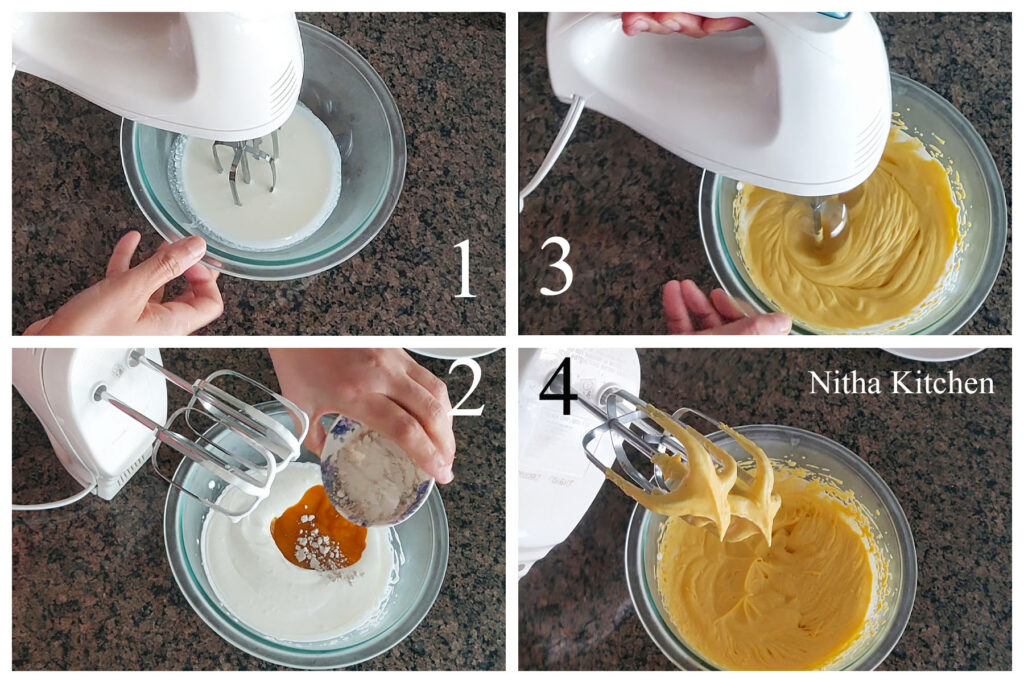
Mango whipping cream is purely optional. In Classic Tiramisu I took a portion of mascarpone whipped cream and soften to spreading consistency by adding whipping cream. You can do the same or just add mascarpone whipped cream as filling. But here in this recipe I took 1/2 cup whipping cream (pic 1) with 1/3 cup mango preserve (Pic 2), Cardamom powder and whipped (pic 3) to stiff peaks (pic 4). Used this as filling for 2 layers. Store in refrigerator until use. You can add icing sugar but I felt sugar in the preserve’s enough.
MANGO MASCARPONE WHIPPED CREAM
Ingredients
Homemade Mascarpone Cheese – 12oz / 340grams (If store bought use 280-300grams)
Whipping Cream / Heavy Cream – 1 Cup / 240ml
Mango Puree – 1/3 Cup
Mango Flavor – 1tsp or Cardamom Powder
Powdered/ Icing Sugar – 1/2 – 3/4 Cup
Preparation
- Cream the prepared mascarpone cheese, creaming prevents grainy texture in your frosting (pic 1).
- In another bowl add cold cream and whip until you see trials in it .
- Once the cream gets thick you can see those trials(pic 2).
- Now add whipped mascarpone cheese, mango preserve, mango flavor and icing sugar (Pic 3 &4).
- Continue whipping until cream gets stiff peaks like shown Pic 5.
- Unlike regular whipped cream this Mascarpone whipped cream thickens so quickly so do watch carefully while whipping and stop whipping at right time.

- The Mango Mascarpone whipped cream has to be smooth, fluffy and spreadable consistency like shown in Pic 6.
- If not and frosting is too thick do adjust with mango preserve or milk.
- If its gooey do adjust with powdered sugar.
- Do chill the frosting until you apply over cake.
EGGLESS MANGO TIRAMISU CAKE
HOW TO TRIM CAKE SPONGES
- Thaw the cake on the day of frosting by keeping it at room temp for few hours (Pic 1).
- After few minutes of thaw yet its firm do trim/level the cake.
- Its easy to trim when they are cold where you get less crumb as well (pic 2).

- I use regular knife to trim (Pic 3) but you can use professional cake leveler as well.
- Start levelling form one side (Pic 3) and continue inserting the knife to the next end .
- While doing this do rotate the cake stand to get even top layer.
- Once done (Pic 4), carefully remove the trimmed portion (Pic 5).
- Actually I used those top trimmed portion in another dessert will update the link after I post it.
- Do watch the Video tutorial at the end of the post to get clear idea on it.
- Do start working on the cake (Pic 6), details follow…
EGGLESS MANGO TIRAMISU CAKE ASSEMBLING
- Once layers of cake sponge, mango nectar, mango whipped cream and mango mascarpone frosting are ready do start assembling the cake.
- Add a bit whipped cream to the center of cake board to hold the cake layers in position.
- Now place the first layer in upright position (pic 6, above).
- Add generous mango nectar over it and on it sides.
- Don’t prick the first layer or you can gently prick holes just on the top of first layer and not very deep.
- Since this is the last layer, it has to hold the weight of entire cake and don’t make it so mushy.
- But for other two layers prick holes (Pic 1) all over the cake 3/4th and soak generously in the mango nectar.
- Rest the layers for 30-40 minutes at room temperature to get soaked up well also do apply nectar twice or thrice as needed (pic 1 & 2).
- Actually during this rest time I whipped the frosting for this cake.

- Later add dollop of whipped cream over nectar soaked first cake layer (Pic 2).
- Spread the cream gently and don’t intact with nectar while spreading (Pic 3).
- Now place the second layer gently over it (placing upside down, Pic 4).
- Now prick holes on the crust and apply mango nectar.
- Let it sit 10 minutes before you add whipped cream filling.
- Add dollop of mango whipped cream over second layer, level the whipped cream (Pic 5).
- Now place the last layer and it also has to placed upside down (pic 6).
- Prick holes over the crust and apply mango nectar.
- Align the layers and wipe excess cream all over the sides of the cake (pic 6).
- Let it chill for 10minutes before you frost.
YouTube Tutorial
CAKE FROSTING
- Reserve 1/3-1/2 cup of frosting to decorate over the cake at last.
- Add dollops of frosting over top of the cake (Pic 1).
- Cover the cake with mango mascarpone whipped cream (Pic 2).
- Start with more frosting and while smoothing you can wipe out excess (pic 3).
- You can make two coats , crumb coat chill for 30-40 minutes and then make second coat.

- But I did only one coat of frosting for this cake.
- While working if you feel the cream gets gooey do chill for 30 minutes and continue working on it.
- So chill the cake whenever necessary.
- Once done with smoothing the sides of the cake do smooth the top (Pic $).
EGGLESS MANGO TIRAMISU DECORATION
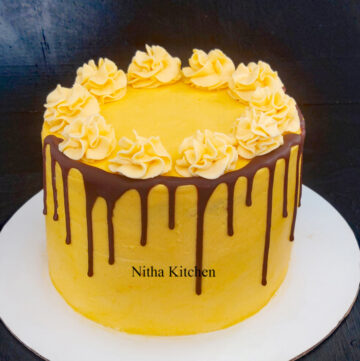
I used a simple decoration using the same Mascarpone whipped cream and chocolate drip just over the sides of the cake. Will explain how I did in detail in the following list of steps.
- Add the reserved Mascarpone whipped cream to piping bag fitted with 1M tool tip.
- Pipe over top of cake like shown at 90 degree angle (Pic 5).
- I thought of piping cream to half of the cake and decorate rest with chocolate drip.
- But kids expressed their views and changed a bit according to their desire.
- Finally piped all over top of the cake and added chocolate drip as well.
- for the chocolate drip, melt the chocolate or waffles over boiling water.
- Once its half melted do take it out form hot water and keep stirring.
- If its tempered and looks glossy dilute the melted chocolate with a tsp shortening or oil.
- The consistency is shown well in the video tutorial.
- When melted chocolate is at room temperature add to bottle and pour over the edges of cake as shown in Pic 6.
- You can allow 8hrs for the sponges to soak well in nectar before cutting the cake.
Printable Recipe Card
- All Purpose Flour – 2.25 Cups
- Thick Curd – 1 Cup
- Flavorless Oil – 1/2 Cup I use cholesterol free oil
- Sugar – 3/4 Cup
- Sweetened Condensed Milk – 1/2 Cup
- Whole Milk – 1/2 Cup
- Baking Powder – 2.25tsp
- Baking Soda – 3/4tsp
- Salt – 1/4tsp
- Mango Flavor – 1tsp
- Mango Puree – 1.5 Cups
- Lemon Juice – 1/2 Tbsp.
- Sugar – 1/2 Cup used 50:50 raw cane sugar and regular one
- Prepared Mango Preserve / Store Bought Puree – 1/2 Cup
- Sugar – 1/4 Cup Half regular and half Raw Cane Sugar
- Lemon Juice – 1tsp Optional
- Water – 3/4 Cup
- Mango Preserve – 1/3 Cup
- Whipping / Heavy Cream – 1/2 Cup 120ml
- Cardamom Powder – 1tsp powdered with sugar
- Optional Powdered Sugar – As Needed 2-4 Tbsp. approximately
- Homemade Mascarpone Cheese – 12oz / 340grams If store bought use 280-300grams
- Whipping Cream / Heavy Cream – 1 Cup / 240ml
- Mango Puree – 1/3 Cup
- Mango Flavor – 1tsp
- Powdered/ Icing Sugar – 1/2 – 3/4 Cup
-
Grease the pans with butter or oil or shortening + flour and keep aside.
-
In a bowl add all purpose flour, baking powder, baking soda and salt, mix them well and keep aside.
-
In another mixing bowl add thick curd/unflavored yogurt and sugar.
-
Whisk them both until sugar incorporates well with yogurt.
-
Later add oil, condensed milk, and milk to yogurt mixture.
-
Now to this wet mixture add the dry ingredients mixture in three batches.
-
Once done do pour the cake batter equally in three 6″ cake pans.
-
Bake in preheated oven @350F/180C for 20-22 minutes.
-
Check the doneness by inserting toothpick at the center of the cake, if it comes out clear do cool over cooling rack.
-
Let them cool for 10 minutes later release the cake from cake pans and let it cool completely.
-
Once cooled completely you can use the cake immediately or wrap it using cling film and store in freezer.
-
In a wide pan, add prepared fresh mango puree, sugar and lemon juice.
-
Simmer for 2-3 mins in low flame make sure it’s not burnt.
-
Keep stirring and when it attains a rolling boil do remove from the flame.
-
Once cooled completely either use immediately or store in clean jar and refrigerate for later use.
-
Simmer water and sugar for 5 mins in low- medium flame.
-
I used the same preserve prepared pan.
-
Later add prepared mango preserve or store bought puree.
-
Adjust sugar if needed and when its hot do add lemon juice and remove from flame.
-
Mango whipping cream is purely optional. In Classic Tiramisu I took a portion of mascarpone whipped cream and soften to spreading consistency by adding whipping cream. You can do the same or just add mascarpone whipped cream as filling. But here in this recipe I took 1/2 cup whipping cream with 1/3 cup mango preserve, Cardamom powder and whipped to stiff peaks. Used this as filling for 2 layers. Store in refrigerator until use. You can add icing sugar but I felt sugar in the preserve’s enough.
-
Cream the prepared mascarpone cheese, creaming prevents grainy texture in your frosting.
-
In another bowl add cold cream and whip until you see trials in it .
-
Once the cream gets thick you can see those trials.
-
Now add whipped mascarpone cheese, mango preserve, mango flavor and icing sugar.
-
Continue whipping until cream gets stiff peaks.
-
Unlike regular whipped cream this Mascarpone whipped cream thickens so quickly so do watch carefully while whipping and stop whipping at right time.
-
The Mango Mascarpone whipped cream has to be smooth, fluffy and spreadable consistency.
-
If not and frosting is too thick do adjust with mango preserve or milk.
-
If its gooey do adjust with powdered sugar.
-
Do chill the frosting until you apply over cake.
-
Thaw the cake on the day of frosting by keeping it at room temp for few hours.
-
After few minutes of thaw yet its firm do trim/level the cake.
-
Its easy to trim when they are cold where you get less crumb as well .
-
I use regular knife to trim but you can use professional cake leveler as well.
-
Start levelling form one side and continue inserting the knife to the next end .
-
While doing this do rotate the cake stand to get even top layer.
-
Once done , carefully remove the trimmed portion.
-
Actually I used those top trimmed portion in another dessert will update the link after I post it.
-
Do watch the Video tutorial at the end of the post to get clear idea on it.
-
Do start working on the cake, details follow…
-
Once layers of cake sponge, mango nectar, mango whipped cream and mango mascarpone frosting are ready do start assembling the cake.
-
Add a bit whipped cream to the center of cake board to hold the cake layers in position.
-
Now place the first layer in upright position.
-
Add generous mango nectar over it and on it sides.
-
Don’t prick the first layer or you can gently prick holes just on the top of first layer and not very deep.
-
Since this is the last layer, it has to hold the weight of entire cake and don’t make it so mushy.
-
But for other two layers prick holes all over the cake 3/4th and soak generously in the mango nectar.
-
Rest the layers for 30-40 minutes at room temperature to get soaked up well also do apply nectar twice or thrice as needed.
-
Actually during this rest time I whipped the frosting for this cake.
-
Later add dollop of whipped cream over nectar soaked first cake layer .
-
Spread the cream gently and don’t intact with nectar while spreading .
-
Now place the second layer gently over it (placing upside down).
-
Now prick holes on the crust and apply mango nectar.
-
Let it sit 10 minutes before you add whipped cream filling.
-
Add dollop of mango whipped cream over second layer, level the whipped cream .
-
Now place the last layer and it also has to placed upside down.
-
Prick holes over the crust and apply mango nectar.
-
Align the layers and wipe excess cream all over the sides of the cake.
-
Let it chill for 10minutes before you frost.
-
Reserve 1/3-1/2 cup of frosting to decorate over the cake at last.
-
Add dollops of frosting over top of the cake .
-
Cover the cake with mango mascarpone whipped cream .
-
Start with more frosting and while smoothing you can wipe out excess.
-
You can make two coats , crumb coat chill for 30-40 minutes and then make second coat.
-
But I did only one coat of frosting for this cake.
-
While working if you feel the cream gets gooey do chill for 30 minutes and continue working on it.
-
So chill the cake whenever necessary.
-
Once done with smoothing the sides of the cake do smooth the top .
-
Add the reserved Mascarpone whipped cream to piping bag fitted with 1M tool tip.
-
Pipe over top of cake like shown at 90 degree angle.
-
I thought of piping cream to half of the cake and decorate rest with chocolate drip.
-
But kids expressed their views and changed a bit according to their desire.
-
Finally piped all over top of the cake and added chocolate drip as well.
-
for the chocolate drip, melt the chocolate or waffles over boiling water.
-
Once its half melted do take it out form hot water and keep stirring.
-
If its tempered and looks glossy dilute the melted chocolate with a tsp shortening or oil.
-
The consistency is shown well in the video tutorial.
-
When melted chocolate is at room temperature add to bottle and pour over the edges of cake.
-
You can allow 8hrs for the sponges to soak well in nectar before cutting the cake.
Leave a Reply