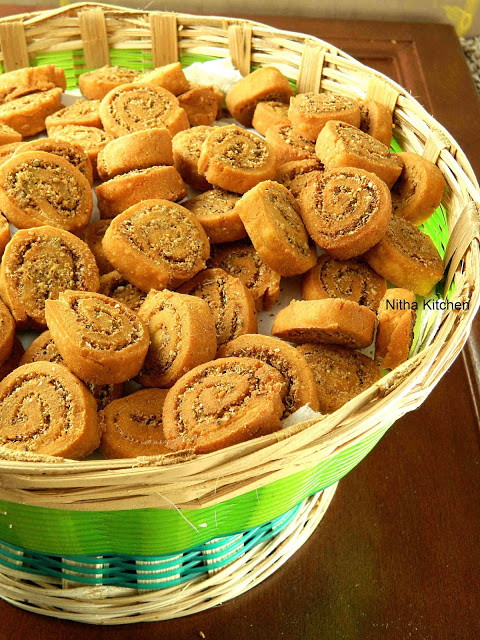
This Bhakarwadi recipe is supposed to publish before Diwali but i couldn’t make it anyways this is a perfect tea time snack you can try and munch all time. Since this is the first time experience with bhakarwadis my mind was thinking all the time for the masala stuff not to come out while deep frying. I got an idea of mixing oil to the mixture and rolling/filling it properly before wrapping the outer layer. That worked very well for me and it was crispy and perfect like store bought Bakarwadi. Do read several tips i have shared to make it crispy and perfect before start making…
Few Tips to remember before start making
- Make very stiff and tight dough.
- While working, it will be little harder to roll but that is what needed for the recipe to get crispy bhakarwadis.
- Mix some oil with the mixture, coarsely grind all the stuff.
- You can first grind the sesame seeds alone if you don’t like them coarse in texture.
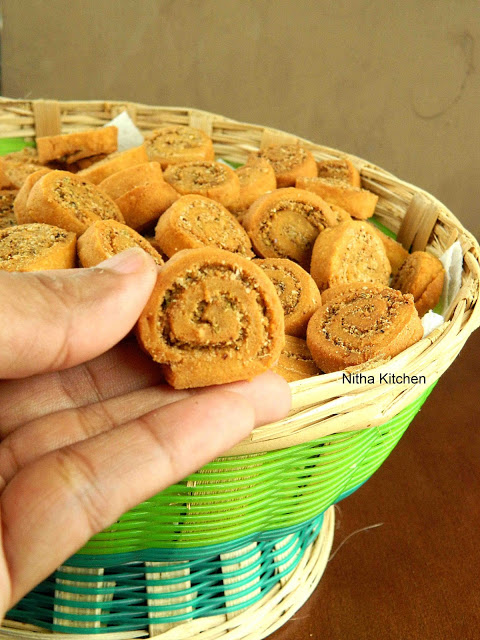
Yields :- 70 Bhakarwadi as shown here in the pictures
Ingredients for the stuffing/Filling (It will come 3/4th Cup)
Coconut Grated – 2.5 Tbsp
Sesame Seeds – 2.5 Tbsp
Poppy Seeds – 2.5 Tbsp
Coriander Powder / Dhaniya – 1tsp
Cumin – 2tsp
Fennel Seeds – 2tsp
Red Chili Powder – 1tsp (I have used Reshampatti Chili Powder and since it’s coarse in texture, grind it with other ingredients)
Amchur Powder – 1/2tsp
Pepper Powder – 1/2tsp
Salt – 1/2tsp
Oil – 1 Tbsp
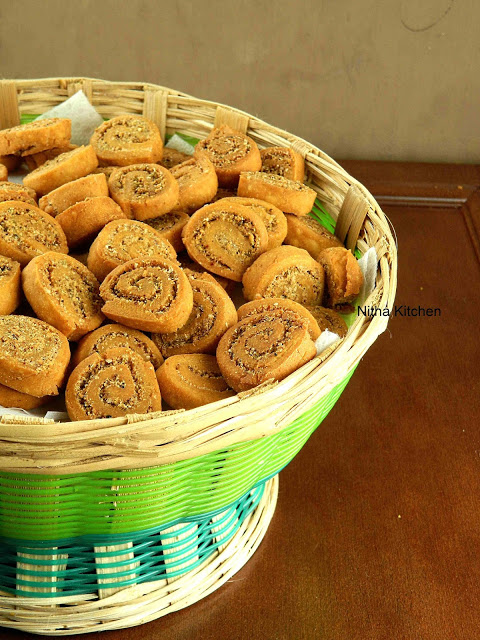
Ingredients for the Outer Layer
Chickpeas Flour / Besan – 1.5 Cups
Wheat Flour / Atta or APF – 1/2 Cup
All Purpose Flour – 1/2 Cup
Water – 1/3 Cup
Oil – 2.5 Tbsp
Chili Powder – 1/2tsp
Turmeric Powder – 1/2tsp
Salt – 1/2tsp
Bhakarwadi Preparation
- First add all the dry ingredients except oil and water listed in the outer layer ingredient list and mix well.
- Now add oil (Pic 1) and rub gently till the mixture looks crumbly (Pic 2).
- Reserve 1 tbsp of the mixture to add it later to the filling.
- Add little bit water to the outer dough mixture and knead to very stiff dough (Pic 3).
- Cover it and let them rest for 30 minutes, meanwhile you can prepare the filling.
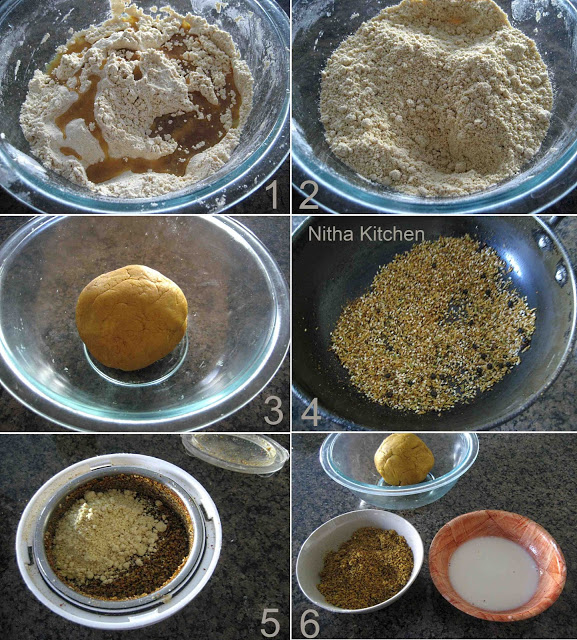
- For the filling dry fry all the ingredients given under filling ingredient list (Pic 4) and allow to cool completely.
- Once it’s at room temperature powder to coarse texture, finally add the reserved outer dough mixture (Pic 5) and just pulse it to mix well.
- Add a tbsp of oil to it and keep it ready (Pic 7).
- Also in a bowl take 2 tbsp of maida and 3-3.5 tbsp of water, make a paste, we are going to use this mixture for binding purpose.
- So far we have prepared the outer dough, filling and binding paste as shown in the picture 6.
- Roll the outer dough to medium thickness not so thin nor thick as shown in the picture 8 also make sure width is small and length is more.
- Trim the edges (Pic 8).
- Apply the maida + water paste all over the inner side of the rolled dough (Pic 8).
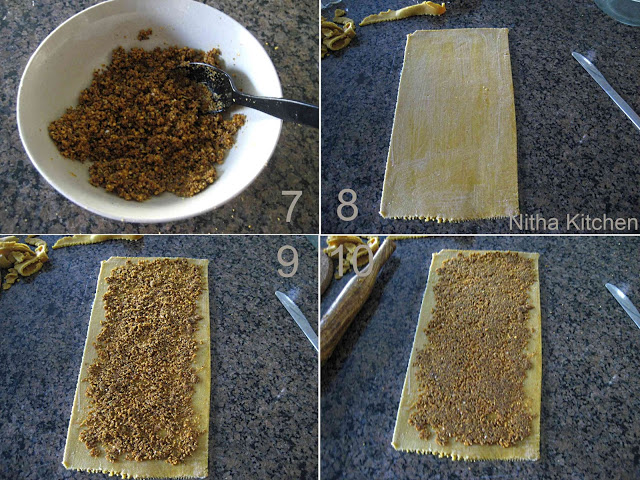
- Add the filling mixture evenly (Pic 9) and using rolling pin gently roll it so that masala mixture/filling stays well while you roll (Pic 10).
- Now gently roll tightly from its left side as shown in picture 11.
- Once rolled cut it in to several even slices (mine are 1/2 inch, Pic 12) and arrange it on a plate or tray Pic 13).
- Heat oil in a wok/pan and fry them in batches, the oil has to be well heated before adding it (Pic 14).
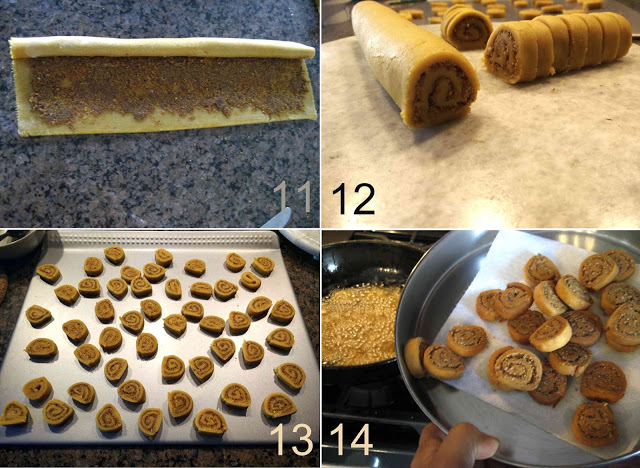
- Don’t disturb them in the beginning of frying, flip them after 3-4 minutes so it cooks well on the other side too.
- Drain excess oil using paper towel (Pic 14) and serve with cup of hot tea/chai or coffee.
- Also this remains fresh for 10 days when stored in an air tight container.

I must say the blog post is just useful for everyone else reading it because the information and knowledge it contains is very important. I like the post! Excellent job! Keep sharing such valuable information through your blogs.
essay writing service