Eggless Whole Wheat Dinner Rolls : Last three weeks we didn’t go out. I hope the same in many houses. Bought a pack of bread that time and within a week it was gone. Luckily I opened a atta bag so using the wheat flour/atta and yeast I made huge quantity of Eggless Wheat Ladi Pav (shown in pictures and video) and stored in refrigerator for later use. When I went last to grocery they limited 1 milk can per person so
while making these buns I was out of milk and used dry milk powder which I bought a while ago to make burfi :-). Likewise lot of grocery shortages in home managing with whatever I have (will be blogging many simple recipes soon). I guess this situation extends for another 1 month for us and schools are completely online learning days till April end. For learn from home kids breakfast, 2 times snack, lunch and dinner etc whenever they feel hungry they ask amma/mom these buns. Sorry for not active in blogging and social media for the past one week with two kids 10 and under hope you understand my situation 🙂 Please read my Notes section at the bottom of post for better understanding of my experiments.
What you can expect in this Post
I mostly make bread/ buns with bread flour which gives nice texture but due to flour shortage in stores and online i experimented with atta and whole wheat flour and without Vital gluten or xanthum gum. All the versions shown in video got success and kids liking it to core. So hereafter i will never go back to white flour 😊. In this recipe you can find Eggless Wheat Ladi Pav aka dinner rolls made with three versions
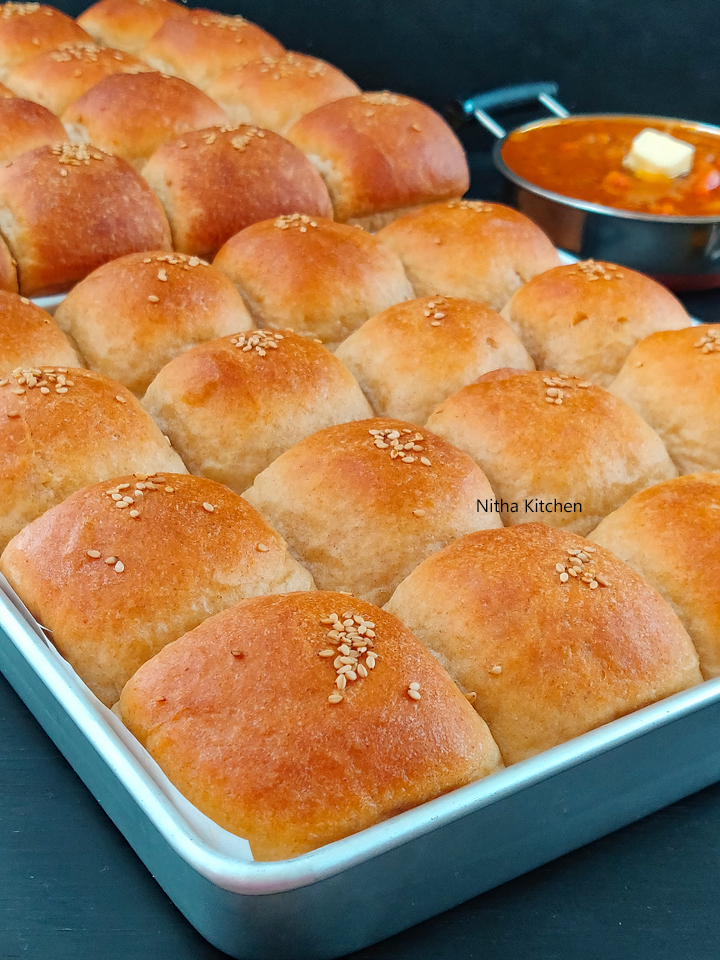
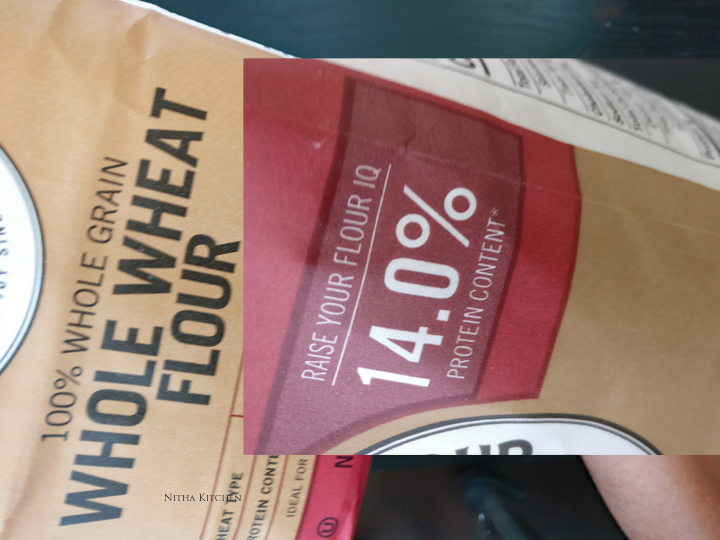
- Pav buns made with 100% atta / wheat flour (in my atta pack it said 14% protein) as shown in above picture.
- Made with half atta and half protein rich whole grain wheat flour (same above pic but in the back).
- Using the same whole wheat bread dough made savory buns on stove top over cast iron pan and savory steamed buns.
Know about Wheat
Whole Grain Wheat Flour contains the Bran, Endosperm and Germ . The bran is the hard outer shell of the edible wheat kernel. Once that shell is broken it adds small sharp shards of bran to milled flour. These small bran shards are also known as fiber! The germ is very inside of the wheat berry which has the potential to sprout as new plant. The endosperm is the inside body of the wheat berry which is the largest portion of the wheat kernel. The endosperm contains starchy carbs, proteins and small amount of vitamins and minerals.
White flour is made from the endosperm only. Brown flour includes some of the grain’s germ and bran, while whole grain or wholemeal flour is made from the entire grain, including the bran, endosperm, and germ and the texture is coarse. Germ flour is made from the endosperm and germ, excluding the bran. Traditional Whole Wheat Flour as shown in video & picture below is milled from a red wheat berry. White Whole Wheat Flour is milled from a white wheat berry (available in US).

Bread Flour: Bread flour is designed for yeast baking. It has a protein content of just under 13% which helps to create more gluten and more rise in our baked breads. It’s a very sturdy flour great to hold together the structure of yeasted doughs. Bread flour has a higher protein content between 12 to 14 percent than all-purpose flour which has 11 percent protein while that of whole wheat flour is 14-14.5%. So if more the protein then more the gluten in your flour.
Gluten is the stringy strands that give bread dough its stretch and elasticity, and baked bread its characteristic chew. Kneading dough develops a network of gluten strands that trap air and produce the airy holes characteristic of many breads. Vital gluten or vital wheat gluten is the extraction of protein with no starch which added to flours in baking to increase the content ie high gluten flour.
How to choose the flour
I have made it with complete Wheat flour (atta) which looks sand like / slight yellow color compared to the White Whole Grain wheat or Red Wheat Berry Flour (available in US) and it is less in protein content compared to others. The one I used for first version in the video is rich in Lutein which is responsible for the color of yellow durum wheat. Do prefer home ground wheat flour which doesn’t undergo much heat while grinding and so the protein content remains high or otherwise buy high protein content flour from the store. So if you feel you are completely using atta try to add vital wheat Gluten or replace half portion of atta with whole grain wheat flour (I did so in second version which has high protein) or 20 % unbleached bread flour to the atta or 20% unbleached all purpose flour to get better buns / dinner rolls.

I have made it with 7 cups flour including Cast Iron Pan and Steamed versions, so I am giving the recipe for one 10X10 inch pan below.
Whole Wheat Dinner Rolls Ingredients
Whole Wheat Flour / Atta – 4.5 Cups (1 cup 150 Grams)
Milk powder/ Almond Meal – 3/4 th Cup or 95 grams plus
WATER – 2.25 CUPS Or
Milk + water – 2.25 Cups
Active Dry Yeast – 10 grams (1 Tbsp Plus 1 Tsp)
Mix of Cane Sugar plus regular sugar – 6.5 Tbsp (decrease for savory Purpose)
Kosher salt – 1.25 tsp
Butter – 5 tbsp plUs 3 tbsp for brushing (use vegan butter & skip salt)
Vital wheat Gluten – 4 Tbsp (OPtional)
Sesame seeds / Sunflower seeds – for topping
Tips for Stove Top Versions
- Use a heavy bottomed pan like cast iron or pressure cooker (remove whistle and gasket).
- You need to cover throughout the process.
- Place a stainless steel or aluminum pan over it but it should not touch the bottom of the cast iron pan if so it burns the buns.
- Place a parchment paper/ wax paper over plates before placing buns.
- I skipped in cast iron stove top method and while removing buns were little stuck to the bottom.
- Otherwise apply cold butter or wet cloth before placing them on plates.
Eggless Whole Wheat Dinner Rolls Dough Preparation
- In a Cup, take 3/4 cup warm water, so remaining milk and water has to be 1.5 cup to knead the dough and in total 2.25 cups.
- Add half quantity of sugar from the recipe, stir well and make sure the mixture is warm.
- Now add yeast, and stir well again.
- Leave them in warm place for 5-7 minutes to activate.
- Meanwhile in a wide bowl take wheat flour, remaining sugar and salt.
- Mix them and before adding the yeast mixture do stir the yeast mixture as well.
- Now gradually add the rest of milk+water content (1.5 cups) while kneading the dough.
- The total kneading time is 15-17 minutes and make sure you add as much moisture to the dough.
- The wheat flour turn dry and needs more water compared to the white flour.
- As shown in video make it slightly sticky dough, apply butter over the kneaded dough, wrap with cling film and rest for an hour for the first rise.

Eggless Wheat Ladi Pav Proofing and Baking Instructions
- After 1 hour of first rise punch (and in summer may be between 45-50 minutes) and release the air well, measure the dough and divide into 16 equal size balls.
- For me it weighed 1300 grams and divided in to 81 grams each for the recipe given above.
- If the dough is dry apply drops of water to your palm and make round shape.
- Otherwise if its sticky (like shown in more protein flour kitchen aid version video) do grease your palms with oil.
- Arrange the balls in the butter greased and parchment layered baking pan.
- Once done with shaping and arranging cover them and in warm place allow them for second proof.
- The white flour based dough needs only 40 minutes in cold/winter time but wheat based buns need 45 minutes for second proofing.
- I live in cold country and for hot places 25-35 minutes is fine after the first proof.
- Do place in warm place during winter for proofing and watch after 20 minutes and till its double in size.
- Once done apply melted butter and top it with sesame seeds.
- In preheated oven bake at 350F / 180 C for 22 minutes.
- Once it is out from oven do apply butter which gives nice color to eggless buns also otherwise the top turns hard.

How to proof Bread dough in Instant Pot
- Place a parchment in the instant pot inner pot (Pic 1).
- Place the kneaded bread dough in the center (Pic 2).
- Set the Yogurt mode in IP for 30 minutes (normal, pic 3).
- In the video I have shown the proofing stages after 15 minutes, after 25 minutes and after 30 minutes of proofing ( Pic 4).

Steamed Eggless Wheat Ladi Pav
- I doubled the recipe and used one portion for baking in stove top and steam.
- For steaming in 5 inch steamer I used 200 grams of first rise dough and 50 grams each bun.

- After the second proof, instead of just melted butter I added garlic powder, Italian herb mix, red chili powder , pinch turmeric powder and salt to it and applied all over the buns (refer picture above).
- Top the buns with sesame seeds.

- In a pan filled half with water allow the water to boil well (Pic 1).
- In high boiling water it took 22 minutes for the buns to get it done.
- Place the stainless steel pan over it (Pic 2) and cover the top.
- Cover with cloth wrapped lid throughout the entire process, cloth absorbs excess water if any over buns and prevent soggy.
- You can check whether it is done or not by touching the top of buns, if its not sticking then its done.
- Immediately after steaming apply herb mixed butter over the buns to give rich color and flavor as shown below.

Stove top Cast Iron Pan Buns
- I used a 8 inch cast iron pan and dough weigh was 360 grams of first rise dough and divided in to 6 so each weighed 60 grams.
- I didn’t add any paper or grease the stainless steel plate before arranging the buns.
- So it stuck a little bit , do add parchment or wet and squeezed cloth for baking over a cast iron pan in stove.
- Also you can use pressure cooker, do remove gasket and whistle and place the arranged buns in aluminum or stainless steel plate or pan.
- Top the buns with sunflower seeds.

- In Preheated Cast Iron pan (for 5-8 minutes in medium flame) place the stainless steel pan carefully (Pic1).
- Cover them through the entire process (Pic 2), and it took 35 minutes in low to medium flame.
- Once its half done you can see shiny texture (applied butter mix melts) over buns (Pic 3).
- After 25 minutes do keep checking by touching the top of buns with your finger, if its not sticky then its done.
- After removing from flame let it be there for inside the cast iron pan for 2-3 minutes.
- Also apply same spice mix to give rich color on top of the buns.
- Once cooled completely remove carefully from the plate.
Video Tutorial
Print Version

learn to make eggless whole wheat ladi pav dinner rolls with video tutorial
- 4.5 Cups WHOLE WHEAT FLOUR / ATTA
- 3/4 Cup MILK POWDER OR 95 GRAMS Plus
- 2.25 Cups WATER – 2.25 CUPS OR
- 2.25 Cups Milk plus Water
- 10 Grams ACTIVE DRY YEAST 1 TBSP PLUS 1 TSP
- 5-6.5 Tbsp MIX OF BROWN PLUS REGULAR SUGAR
- 1.25 tsp KOSHER SALT
- 5 Tbsp BUTTER PLUS 3 TBSP FOR BRUSHING
- 4 Tbsp VITAL WHEAT GLUTEN OPTIONAL
- SESAME SEEDS / SUNFLOWER SEEDS – FOR TOPPING
-
In a Cup, take 3/4 cup warm water, so remaining milk and water has to be 1.5 cup to knead the dough and in total 2.25 cups.
-
Add half quantity of sugar from the recipe, stir well and make sure the mixture is warm.
-
Now add yeast, and stir well again.
-
Leave them in warm place for 5-7 minutes to activate.
-
Meanwhile in a wide bowl take wheat flour, remaining sugar and salt.
-
Mix them and before adding the yeast mixture do stir the yeast mixture as well.
-
Now gradually add the rest of milk+water content (1.5 cups) while kneading the dough.
-
The total kneading time is 15-17 minutes and make sure you add as much moisture to the dough.
-
The wheat flour turn dry and needs more water compared to the white flour.
-
As shown in video make it slightly sticky dough, apply butter over the kneaded dough, wrap with cling film and rest for an hour for the first rise.
-
After 1 hour punch and release the air well, measure the dough and divide into 16 equal size balls.
-
For me it weighed 1300 grams and divided in to 81 grams each for the recipe given above.
-
If the dough is dry apply drops of water to your palm and make round shape.
-
Otherwise if its sticky (like shown in more protein flour kitchen aid version video) do grease your palms with oil.
-
Arrange the balls in the butter greased and parchment layered baking pan.
-
Once done with shaping and arranging cover them and in warm place allow them for second proof.
-
The white flour based dough needs only 40 minutes but wheat based buns need 50 – 60 minutes (and in summer may be between 45-50 minutes) for second proofing.
-
Once done apply melted butter and top it with sesame seeds.
-
In preheated oven bake at 350F for 22 minutes.
-
Once it is out from oven do apply butter which gives nice color to eggless buns also otherwise the top turns hard.
Recipe Video
- For 90 grams milk powder the package suggested to use 3 and 3/4th cup water.
- I used half Turbinado / Raw cane sugar and half organic white sugar or just organic sugar for this recipe.
- If the quantity is huge and have electric mixer do refer my video for complete tutorial.
- I used same quantity (4 5 cups flour) 100% atta flour in first version and same quantity half atta and half whole grain wheat (4.5 cups) flour but in above picture you can notice the height difference.
- The one in front was made with 100% atta and one at the back made with 50% atta and 50% whole grain flour.
- But both yielded soft and fluffy buns. But make sure to use protein rich whole wheat flour to get better texture .
- I didn’t use vital wheat gluten in any of these versions.
- Make the dough sticky and moist, since wheat flour absorbs more water and after first rise it looks perfect.
- Use good quality yeast and don’t reduce the sugar quantity please.
- So my conclusion is protein less wheat flour gives dense bun compared to the protein rich flour. Happy baking 😊

NOTES
- For 90 grams milk powder the package suggested to use 3 and 3/4th cup water.
- I used half Turbinado / Raw cane sugar and half organic white sugar or just organic sugar for this recipe.
- If the quantity is huge and have electric mixer do refer my video for complete tutorial.
- I used same quantity (4.5 cups flour) 100% atta flour in first version and same quantity half atta and half whole grain wheat (4.5 cups) flour but in above picture you can notice the height difference.
- The one in front was made with 100% atta and one at the back made with 50% atta and 50% whole grain flour.
- But both yielded soft and fluffy buns. But make sure to use protein rich whole wheat flour to get better texture .
- I didn’t use vital wheat gluten in any of these versions.
- Make the dough sticky and moist, since wheat flour absorbs more water and after first rise it looks perfect.
- Use good quality yeast and don’t reduce the sugar quantity please.
- Don’t under proof or over proof your bun/bread it changes the texture of it.
- So my conclusion is protein less wheat flour gives dense bun compared to the protein rich flour. Happy baking 😊
You guys are asking in messages and comments about this gorgeous color on buns, first tip apply butter immediately out from oven. Second reason i made it for dinner, had small proportion and rest kept in the fridge, next day i warmed it again in oven applied some butter before taking pictures. Third reason also looks bright because of Hard Red Wheat (the name of wheat available in US) and editing the pictures. Few pictures below tried by fans/followers.

Baked Bun Tried By Chandni

Steamed Bun Tried By Chandni

Whole wheat pav tried by Pavani

Sathya tried with 20% all purpose flour

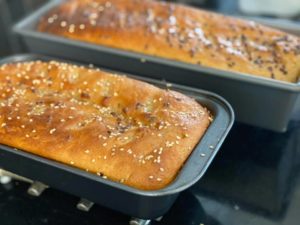
Anupama tried it in bread pan

Anupama tried pav buns
https://www.nithaskitchen.com/2015/02/eggless-wheat-pav-buns.html
https://www.nithaskitchen.com/2014/01/kale-green-leaf-stuffed-oats-buns.html
It did not came out like yours. I tried only Sujata’s sarbati atta.
Sorry i am not aware of the protein content in the brand you mentioned do add vital Gluten or 20% all purpose or bread flour next time to increase the protein level.
Thank you I will try again 🙂
May I know where did you buy 10” by 10” square pan? Looking for one but can’t able to find it🤦♀️
Dhivya its Wilton brand do check in amazon 10X10 inch with 2 inch height.
Can you please give measurements in grams.
will do
also yeast matters 🙂
Perfect….detailed information.. lovely
Which WWF do you suggest?How much protein content?
After my research, I could find between 11%-12%protein content. I had tried with Ashirwad, patanjali and star. But couldn’t get result like yours, even home milled atta didn’t work. Yes receipe was different. Once my query is solved , I would like to try your recipe
Jyoti as suggested in the recipe if the protein content is low in the wheat flour you use do add vital gluten or 20% all purpose flour to attain good result.
do try my recipe and let me know, also yeast matters do use good quality 🙂
Hi Sangeetha, can I use food processor dough kneading blade for kneading the dough? If so for how much time shld I knead it in fp?
Hi Priya yes you can, it takes 2-3 minutes for the dough to get ready in the food processor !
I dnt have milk powder, hw much quantity milk I Shld take as substitute?
Milk + water – 2.25 cups instead of milk powder and water.
Hi Mitha
Can you tell me how many total buns we can prepare out of these measurements.
16 buns Sushma !